
Documentation
Build & Publish
This page walks you through turning your project into an installable app and getting it onto the Google Play Store and the Apple App Store. Once you've finished the Installation, Customisation and Services sections, this is the final step.
There are two very different stages:
- Build — packaging your project into a file (
.aabor.apkfor Android,.ipafor iOS) that the stores understand. - Publish — uploading that file to the store, filling in your app's description, screenshots, and prices, and submitting it for review.
Before you start
Make sure the following are done before building a release version:
- Setup and configuration are complete — the app runs successfully on your phone or emulator via
flutter run. - Version numbers are up to date (see below).
- Store accounts are ready — a Google Play Console developer account for Android and an Apple Developer Program membership for iOS.
- App name, icon, screenshots and other store assets are prepared (see Store listings below).
Step 1 — Update your version numbers
Every time you release a new version to the stores, you must increase the version numbers. Both stores refuse to accept an upload that has the same version number as one that's already there.
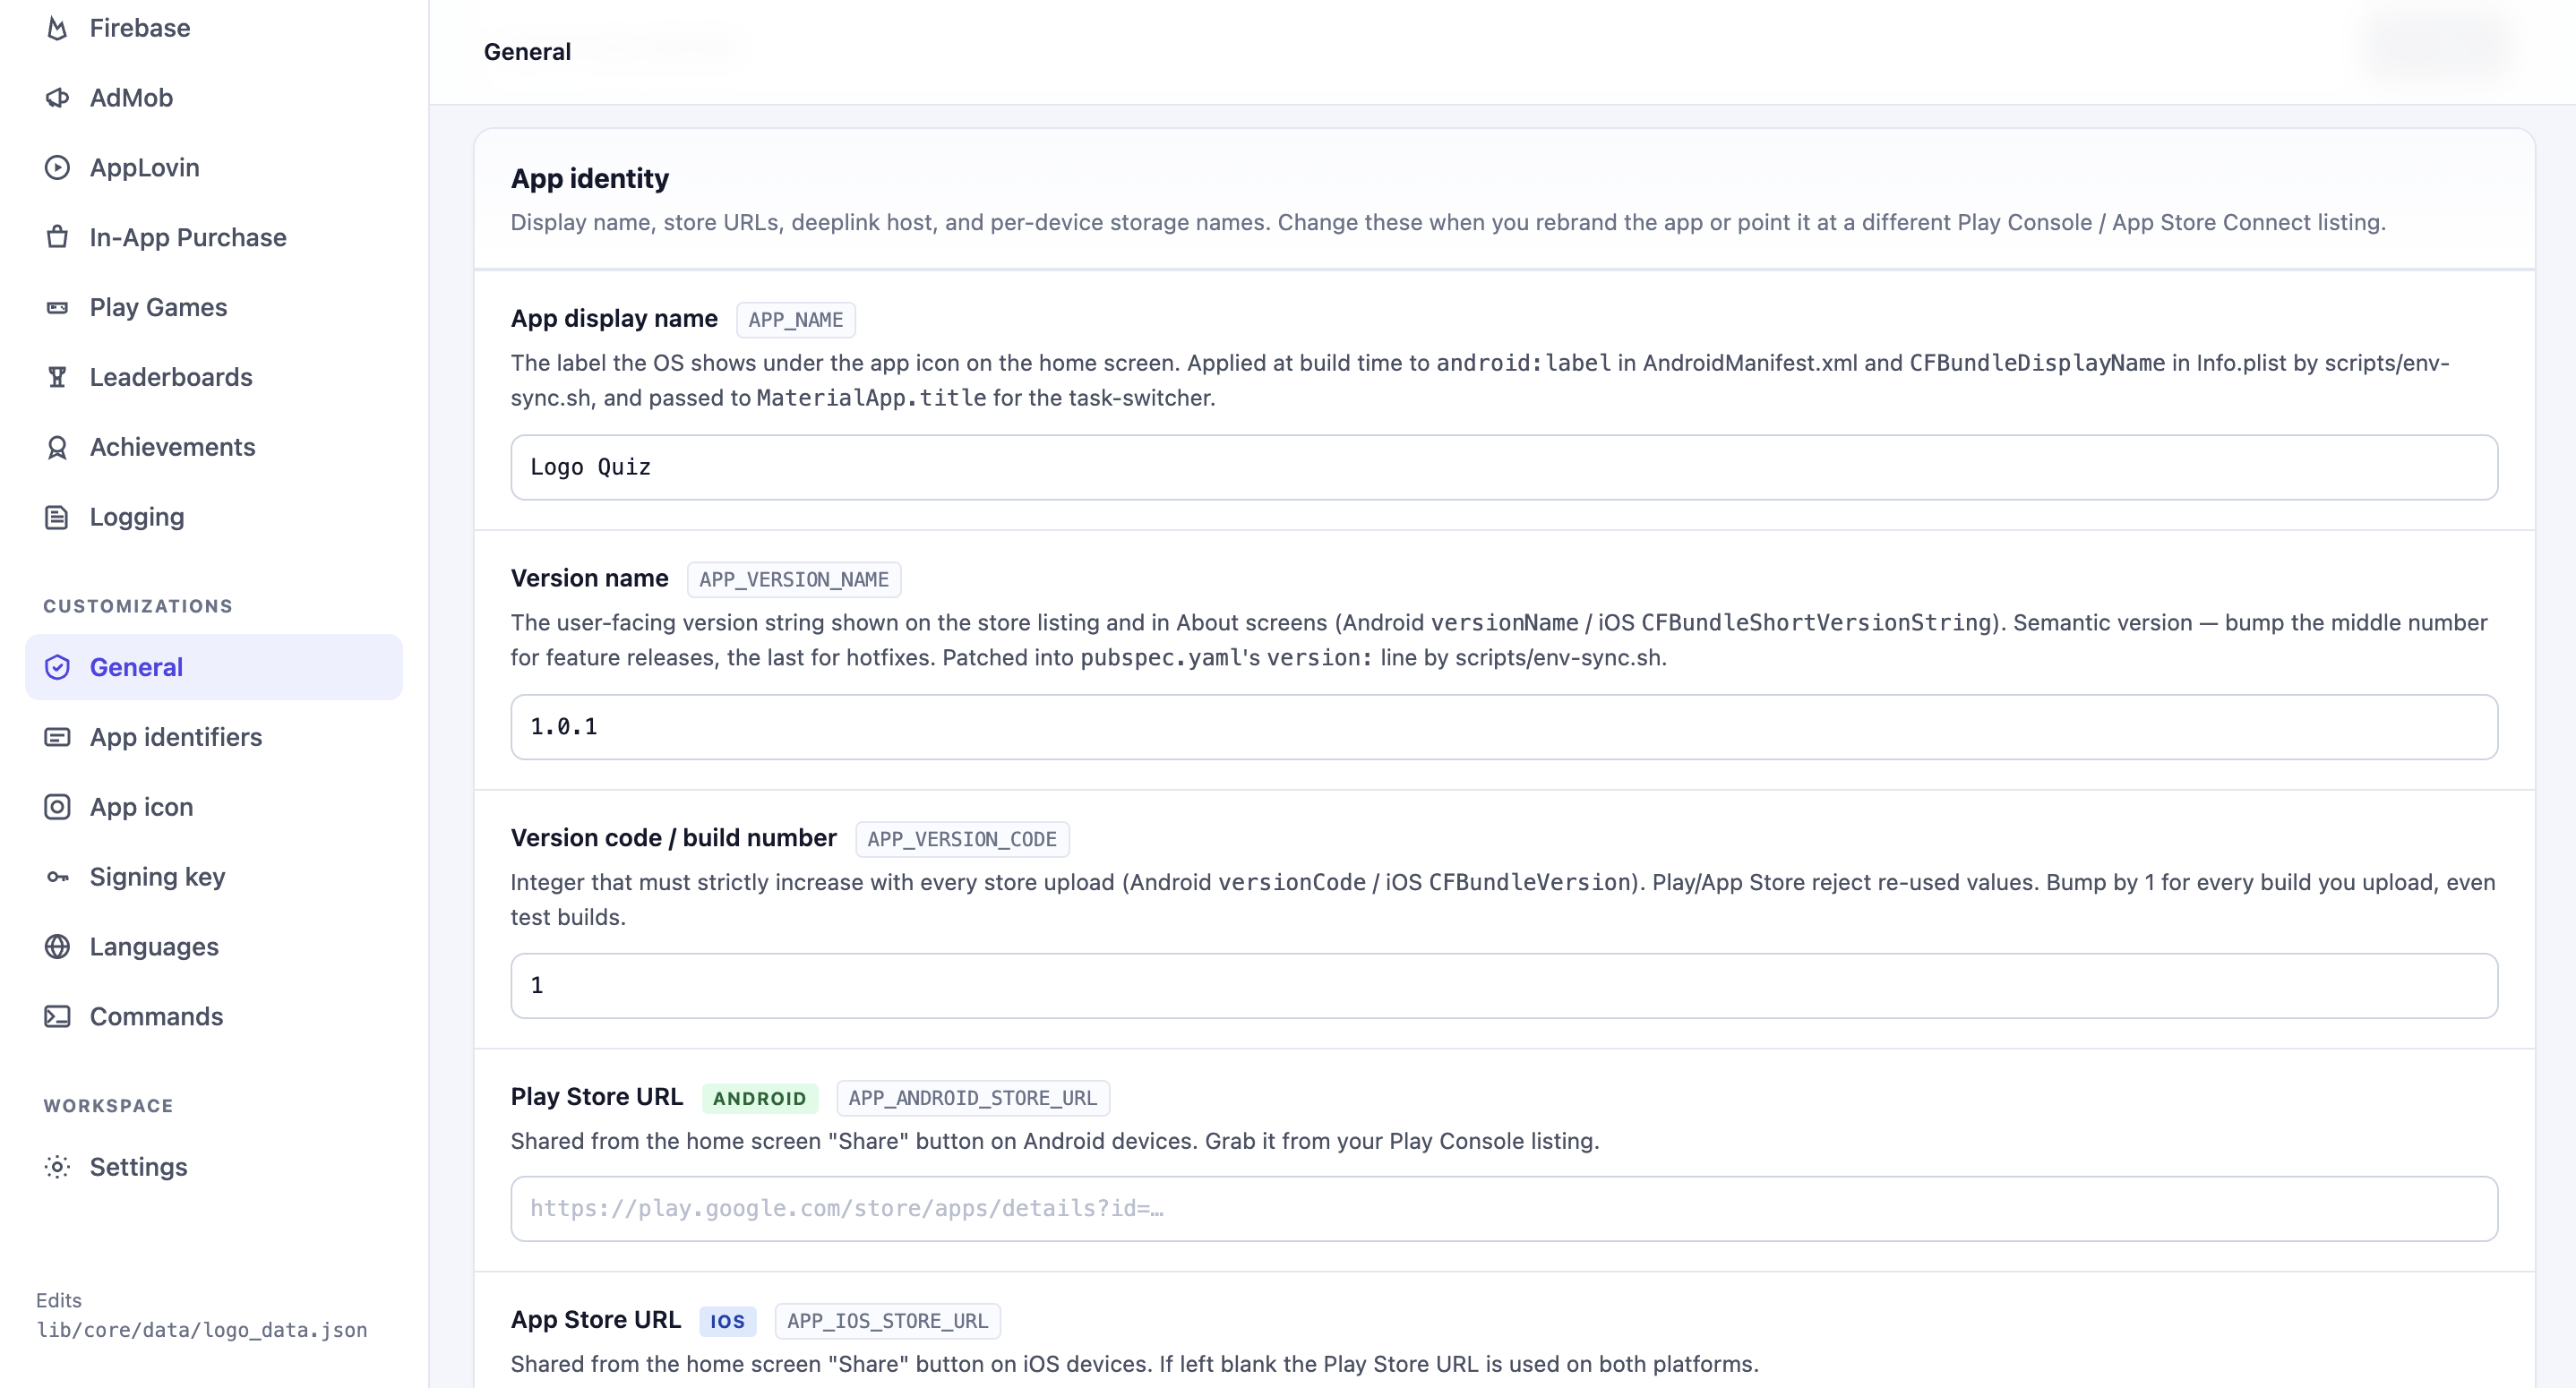
Open setup.html → Customisations → General and update these two fields:
- App version name — the version people see on the store, like
1.0.0,1.1.0,2.0.0. Follow the "big change . medium change . small fix" convention. - App version code — a whole number that must go up by at least 1 every release (e.g.
1→2→3). Users never see this number, but Google Play uses it to know a build is newer than the previous one.
Save the setup page and continue.
Step 2 — Build for Android
Google Play requires apps to be uploaded as an App Bundle (.aab), not an APK. Open a terminal in the project folder and run:
make build-aabWhen it finishes, your app bundle is at:
build/app/outputs/bundle/release/app-release.aabNeed an APK instead? APKs are useful for sharing a testable version directly with someone (e.g. installing on a phone via cable). Run
make build-apk— the file will be atbuild/app/outputs/flutter-apk/app-release.apk.
Step 3 — Build for iOS (macOS only)
To build for iOS, run:
make build-ipaWhen it finishes, your iOS build (called an IPA file) is at:
build/ios/ipa/If this is the first time you're building for iOS, Xcode may ask you to sign in with your Apple Developer account and choose a signing team — follow the prompts.
Step 4 — Publish to the Google Play Store
- Go to the Google Play Console and open your app (or create it if you haven't yet).
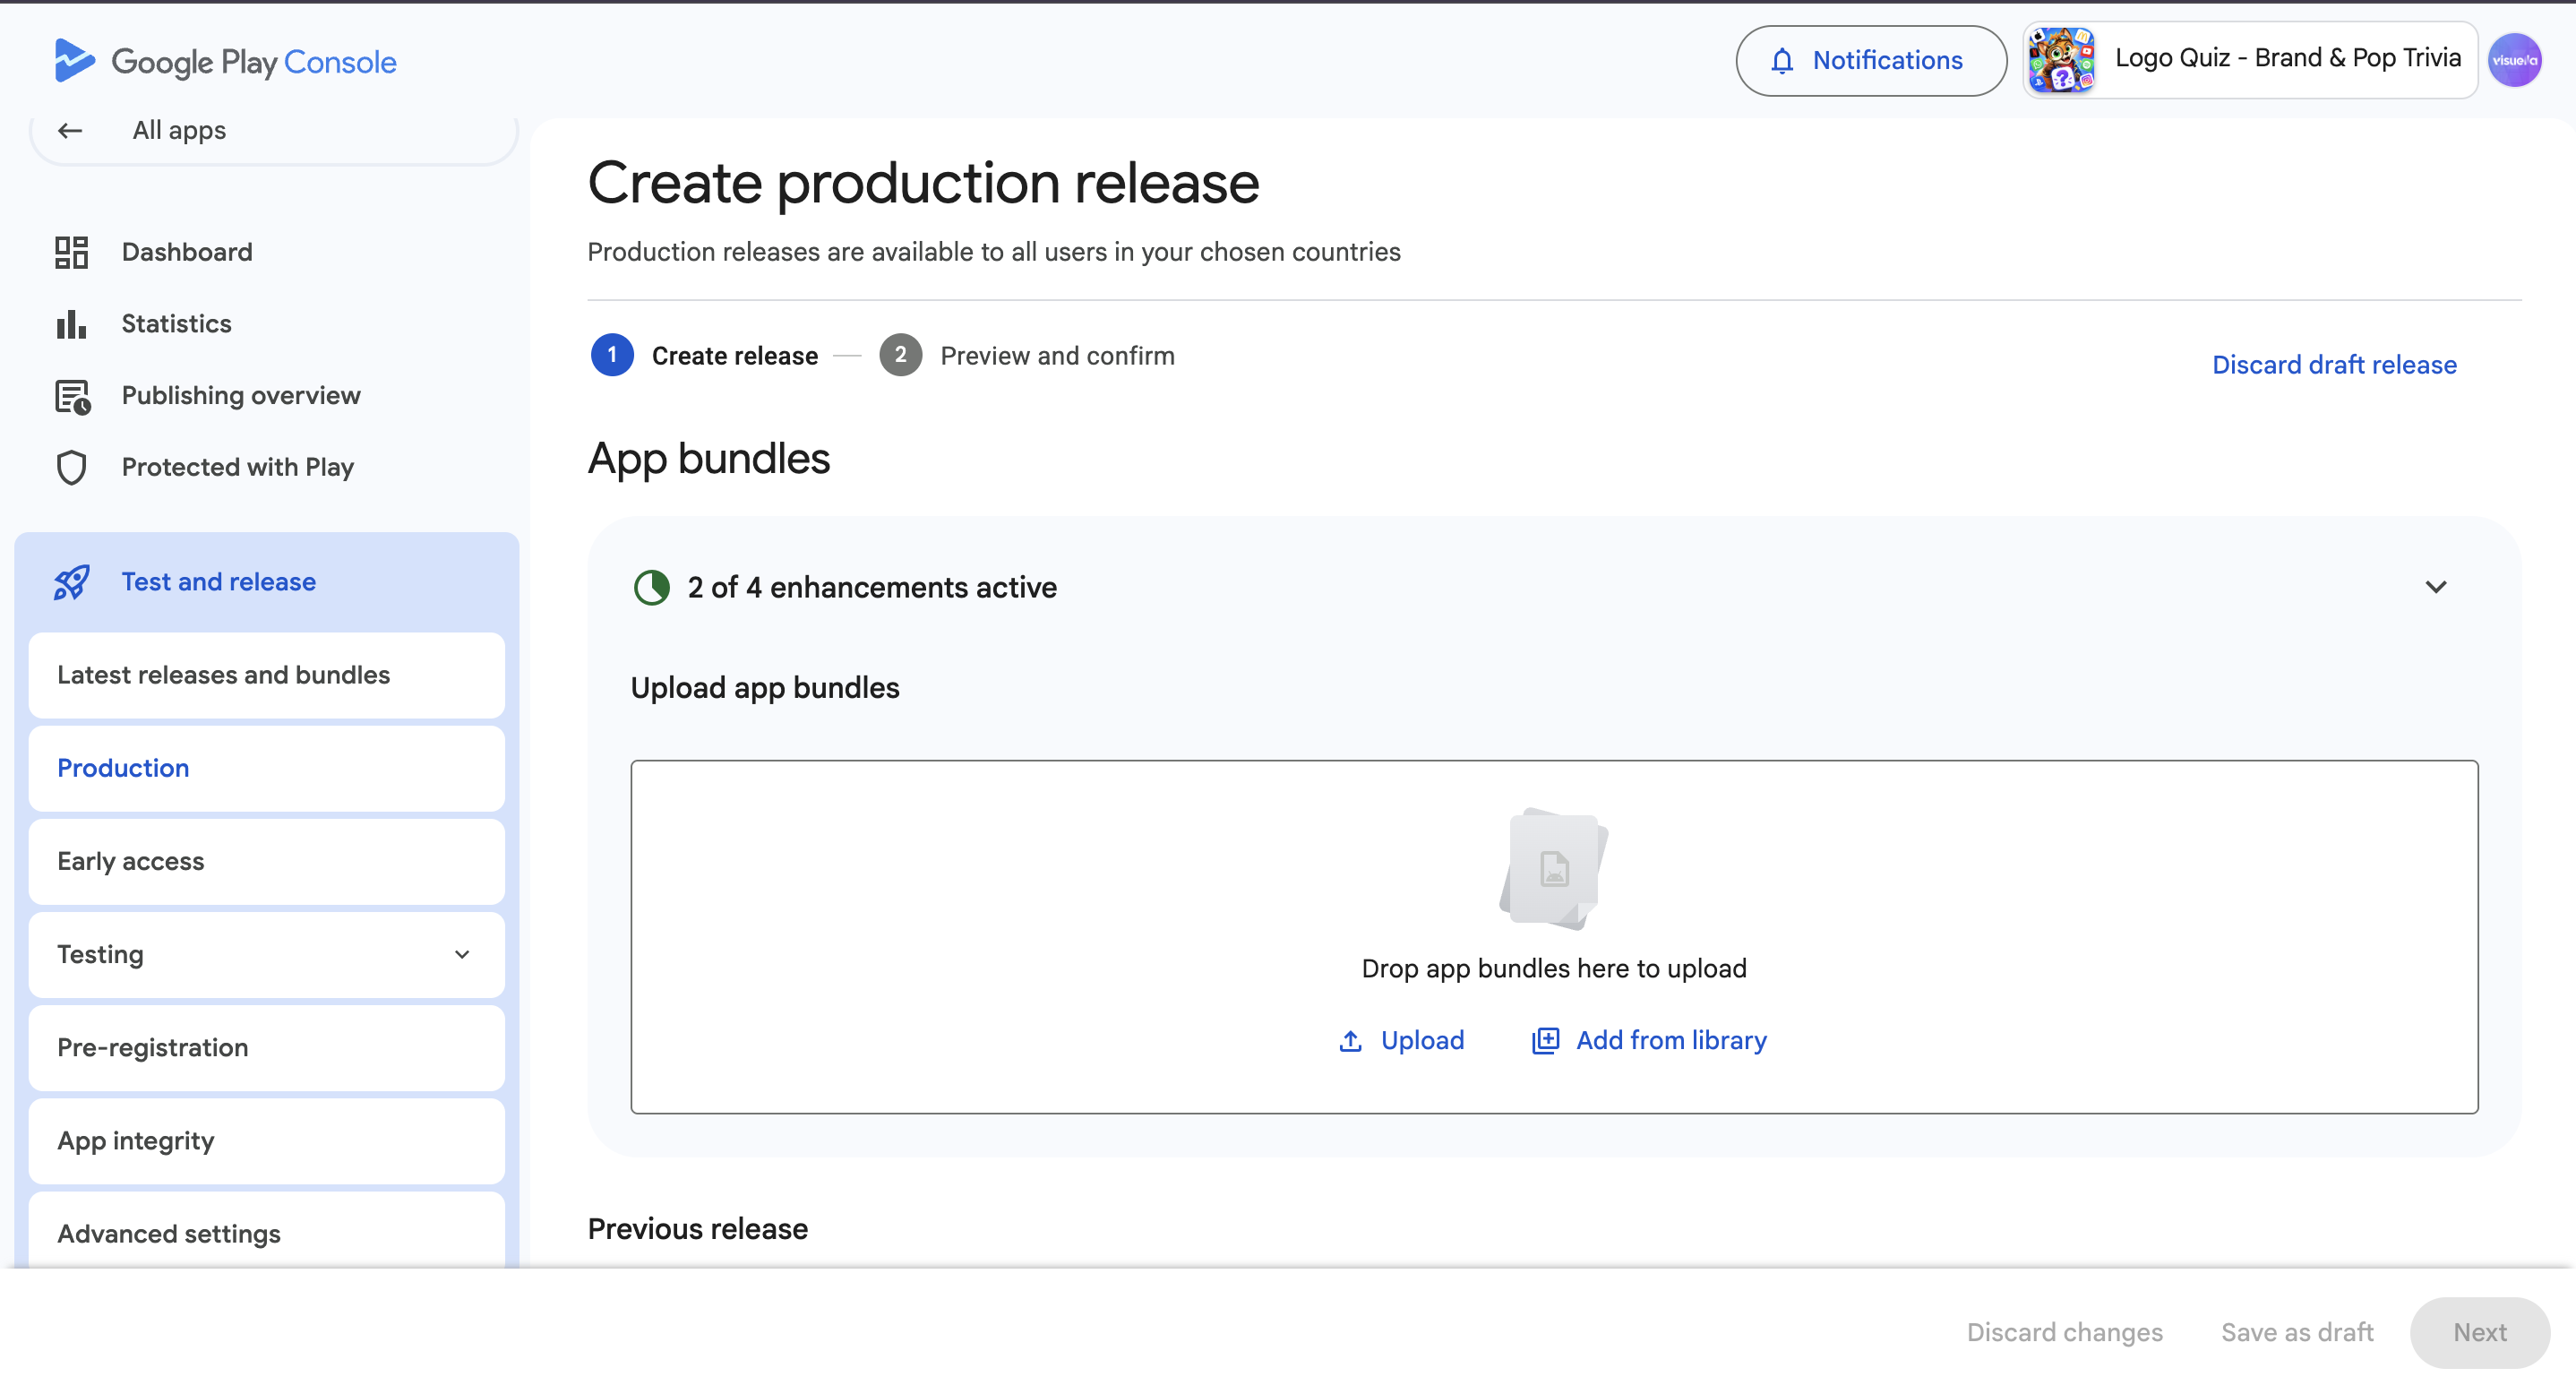
- In the left menu, go to Release → Production → Create new release.
- Upload the
.aabfile you built in Step 2. - Add release notes describing what's new in this version.
- Save and click Review release, then Start rollout to production.
Your first submission takes a few days to review. Later updates are usually reviewed within a few hours to a day.
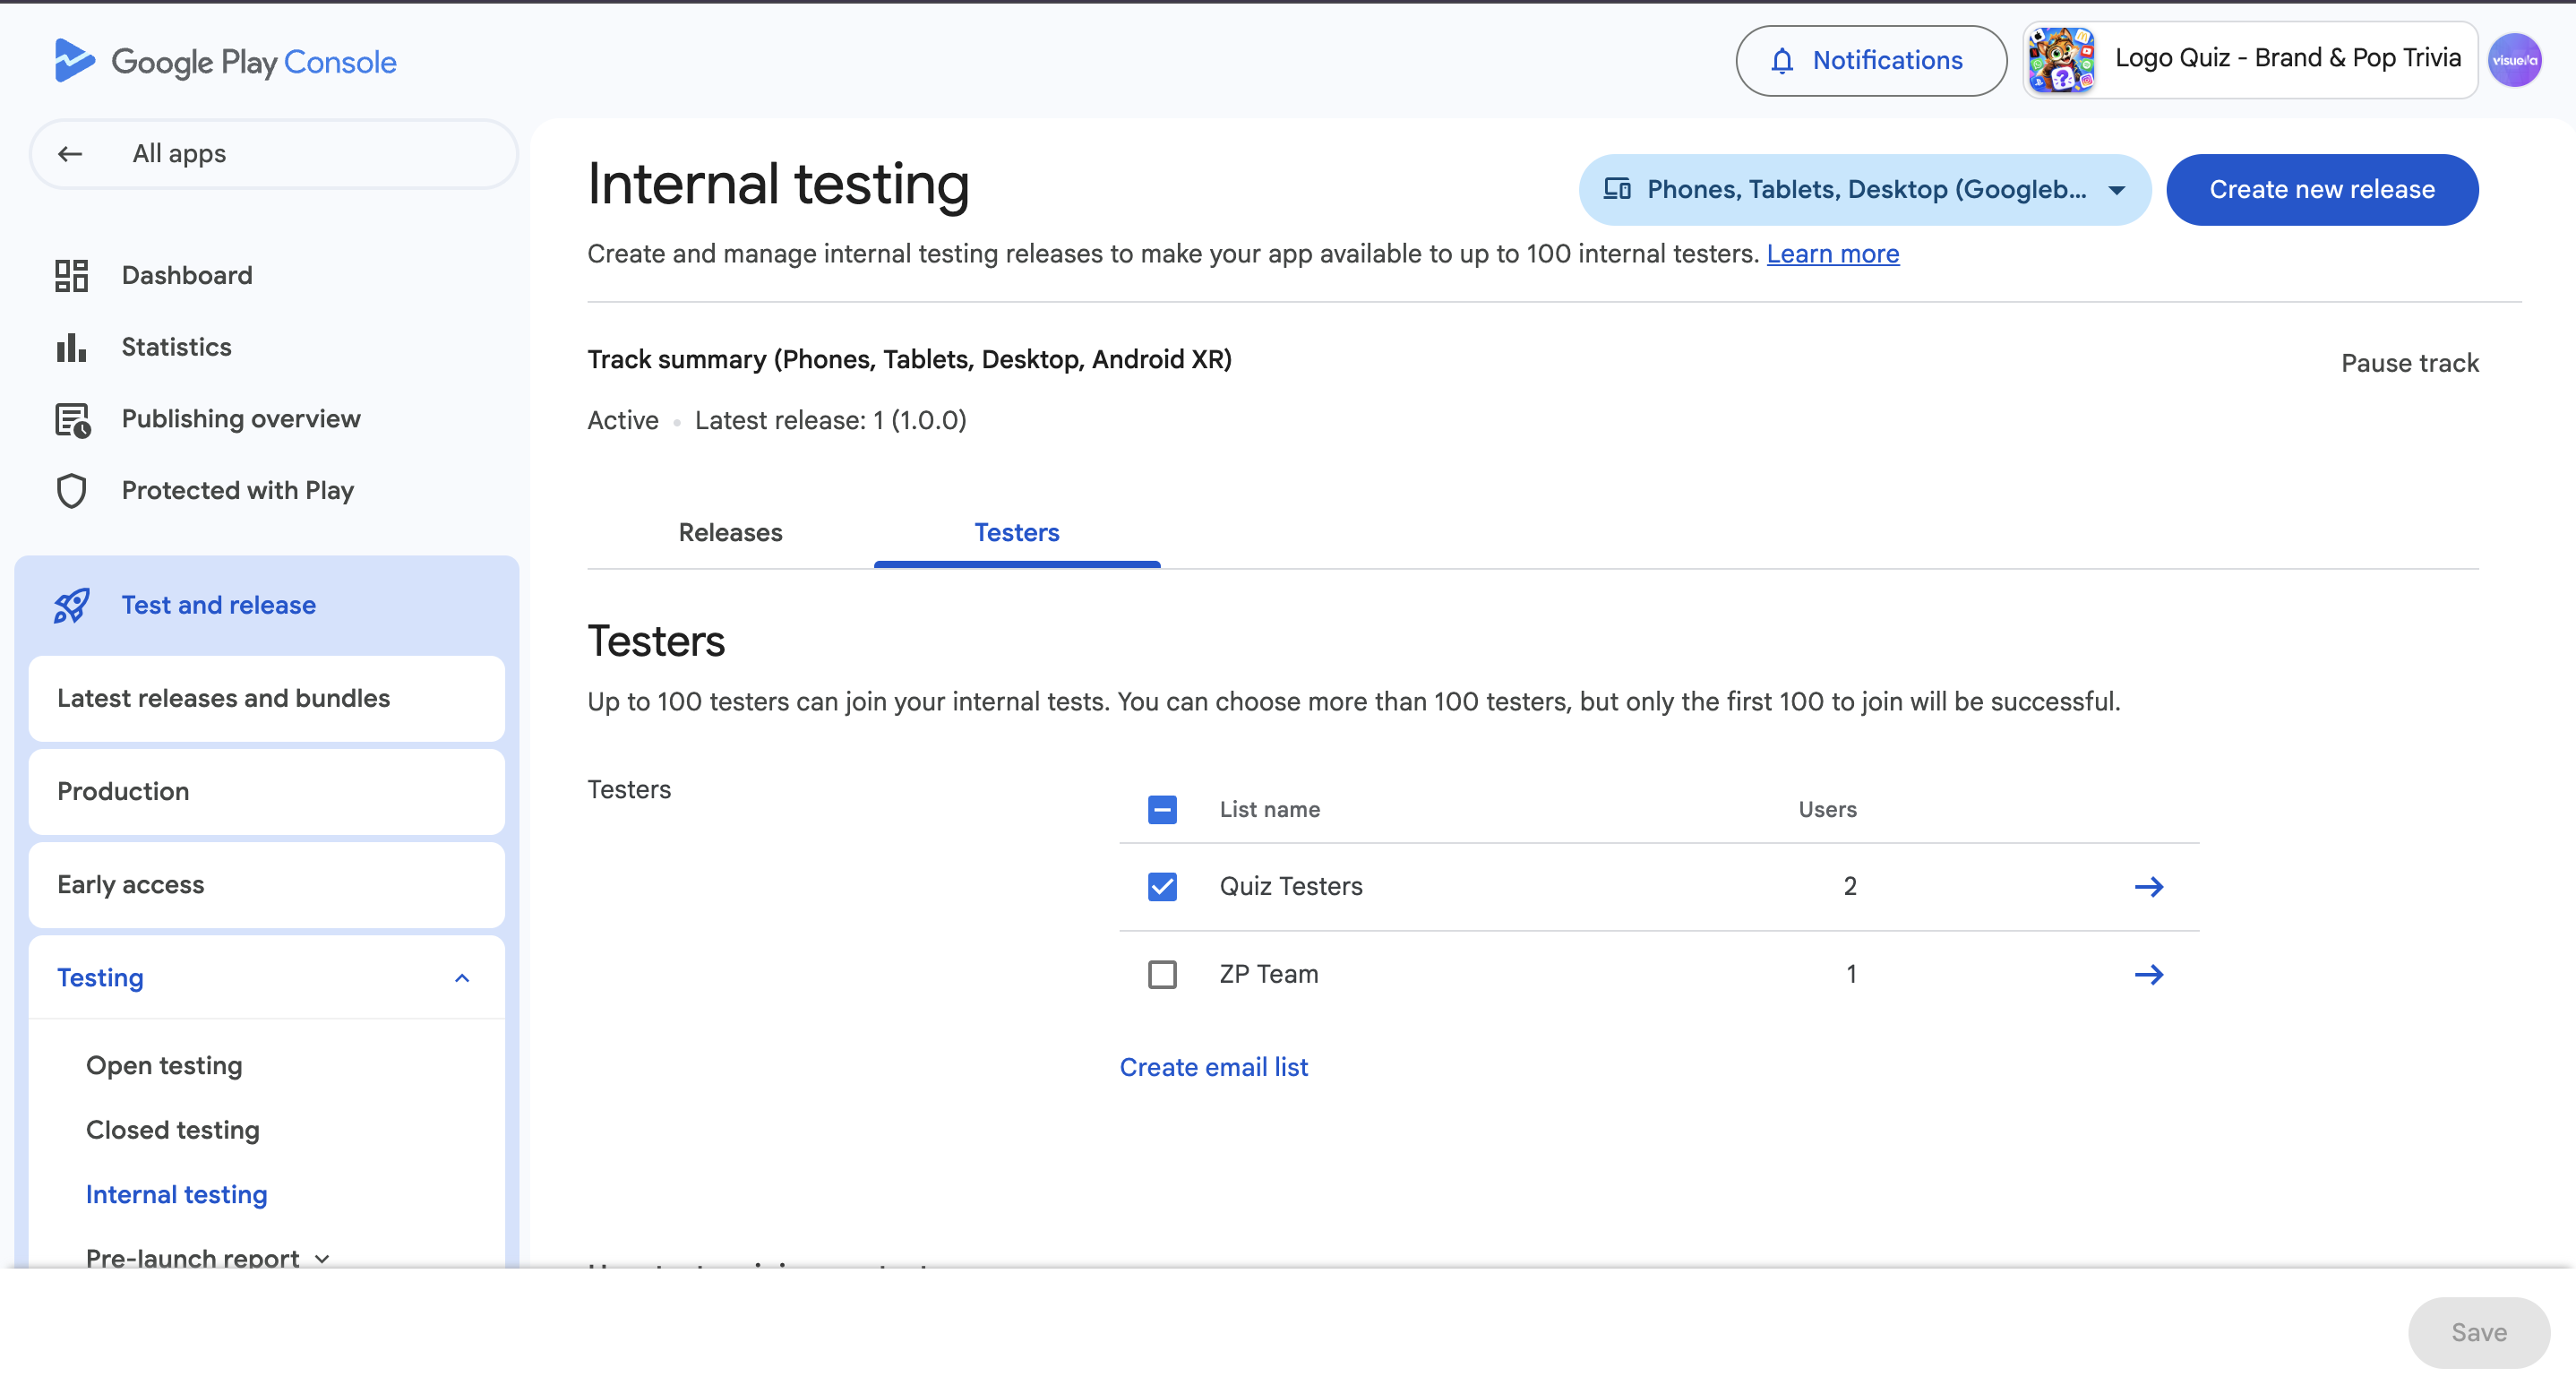
Testing tracks first (recommended). Instead of going straight to production, upload to Internal testing first — you can add yourself and a few friends as testers, install the app from the Play Store on your device, and check that everything works (in-app purchases, ads, Play Games, etc.). Then promote the same build to production once you're happy with it.
Step 5 — Publish to the Apple App Store
- Open App Store Connect and create your app (My Apps → +).
- Fill in the app's metadata (name, description, screenshots, category, age rating, privacy details).
- Upload the IPA file from Step 3 using one of the following:
- Transporter — a free app from the Mac App Store. Open it, drag your IPA in, and click Deliver.
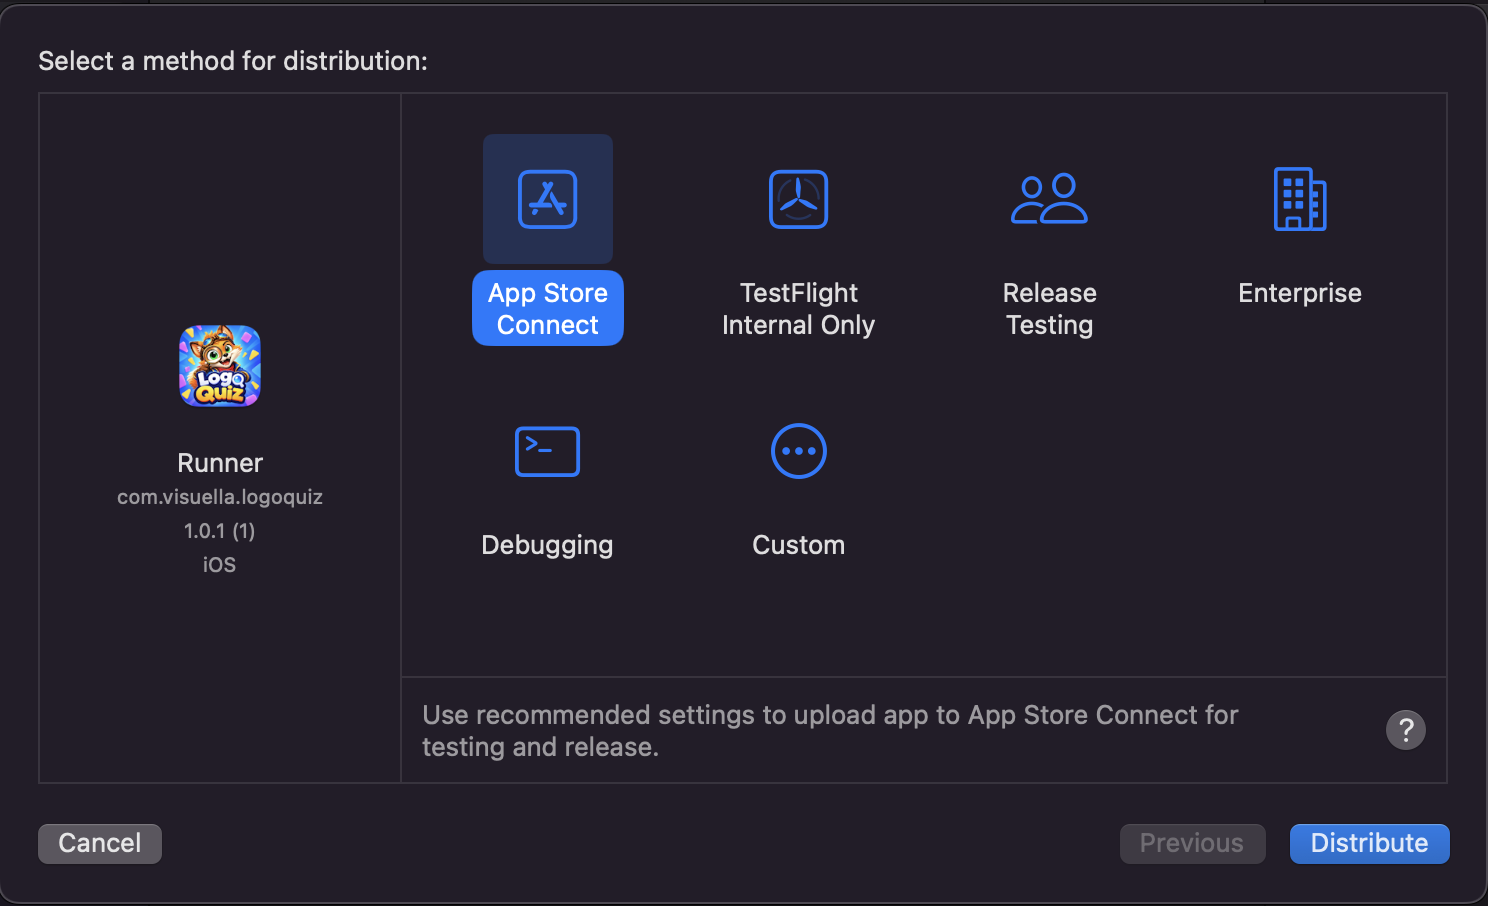
- Xcode — open
ios/Runner.xcworkspacein Xcode, then Product → Archive → Distribute App.
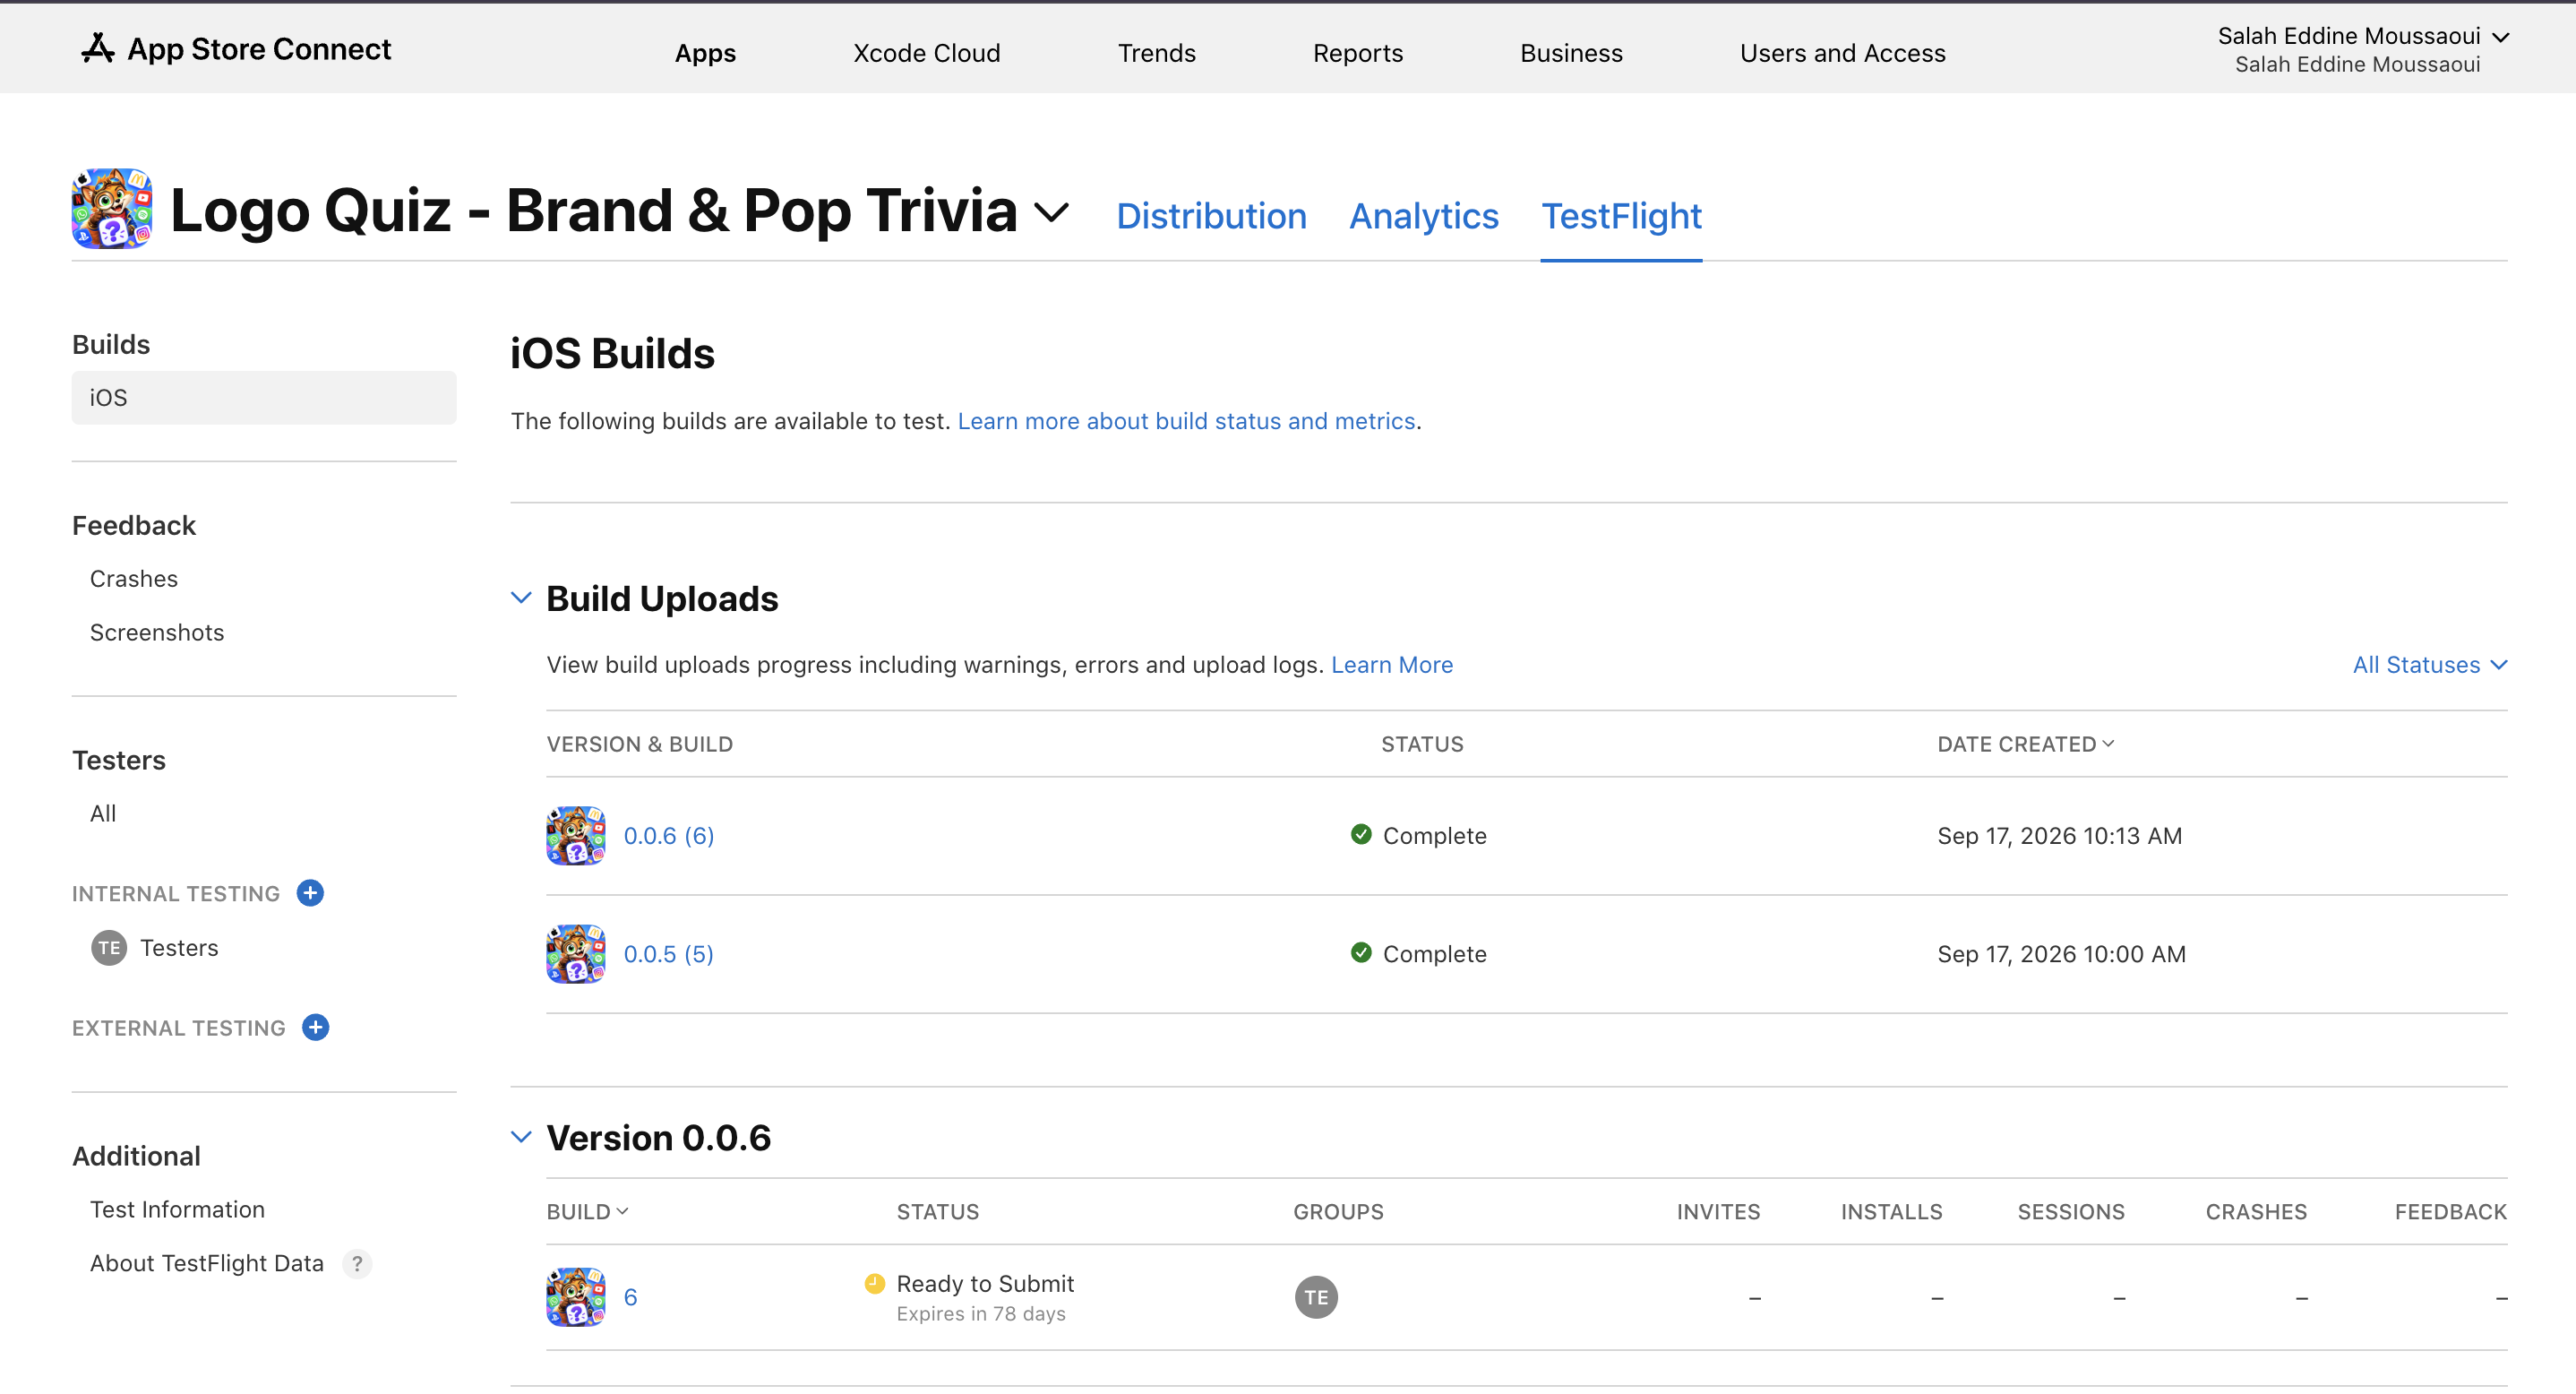
- Once the upload finishes, go back to App Store Connect. Your build appears under TestFlight after a few minutes.
- Attach the uploaded build to your app version, fill in the "What's new" notes, and click Submit for Review.
Apple's review usually takes 24–48 hours.
TestFlight first (recommended). Before submitting to the App Store, use TestFlight to try the build on real devices with a few invited testers. It's the equivalent of Google Play's Internal testing.
Store listings — what to prepare
Both stores need the following, separately from the build itself. Prepare them in advance to avoid delays:
- App name and short subtitle / tagline.
- Description — a longer paragraph or two about what the app does.
- Screenshots — several per device family (phone, tablet). Both stores are picky about exact dimensions — check their current requirements.
- Feature graphic — Google Play only. A single banner-style image shown at the top of your store page.
- App icon — a high-resolution version (1024×1024 for iOS).
- Privacy policy URL — required by both stores. Must be a live, publicly accessible web page.
- Content rating / age rating — filled in via a short questionnaire on each store.
You can find starting-point assets in your project under assets/store/, and the live listings for Logo Quiz on visuella-dz.com are a good real-world reference.
Common problems
"Version code has already been used" — you forgot to bump the version code in Step 1. Increase it, rebuild, and re-upload.
"Upload failed — signing certificate mismatch" (iOS) — the signing team in Xcode doesn't match your Apple Developer account. In Xcode, open ios/Runner.xcworkspace, click on Runner in the sidebar, go to Signing & Capabilities, and select the correct team.
"App not signed by upload certificate" (Android) — you're using a different keystore than the one your app was first published with. See Installation → Android Signing Key.
In-app purchases or Play Games don't work in a locally-installed APK — that's expected. These features only unlock when the build is uploaded to a Play Console track (Internal testing is the quickest) and installed via the Play Store on a device signed in as a tester. See Services → In-App Purchase and Services → Play Games.
FAQ
Frequently asked questions
Where do I get the latest version of the app?
On your CodeCanyon Downloads page, signed in with the account you bought the app with. Updates are free for life — see the Upgrade Code page for the safe way to move to a new version.Do I need a Mac to publish on the App Store?
Yes. Building an iOS `.ipa` file requires Xcode, which only runs on macOS. Android builds work on any operating system.Why don't in-app purchases work when I install the APK on my phone?
In-app purchases, Play Games and other Google Play services only unlock when the build is uploaded to a Play Console track (Internal testing is the fastest) and installed via the Play Store on a device signed in as a tester.Do you provide the source code?
Yes — every CodeCanyon purchase includes the full Flutter source code plus all assets, so you can customise anything.Can I use the same license for two different apps?
No. Envato's Regular License covers a single end product. If you want to publish a second app based on the same template, buy a second license on CodeCanyon.How long does store review take?
Google Play: a few days for the very first submission, then a few hours to a day for updates. Apple App Store: usually 24–48 hours per submission.